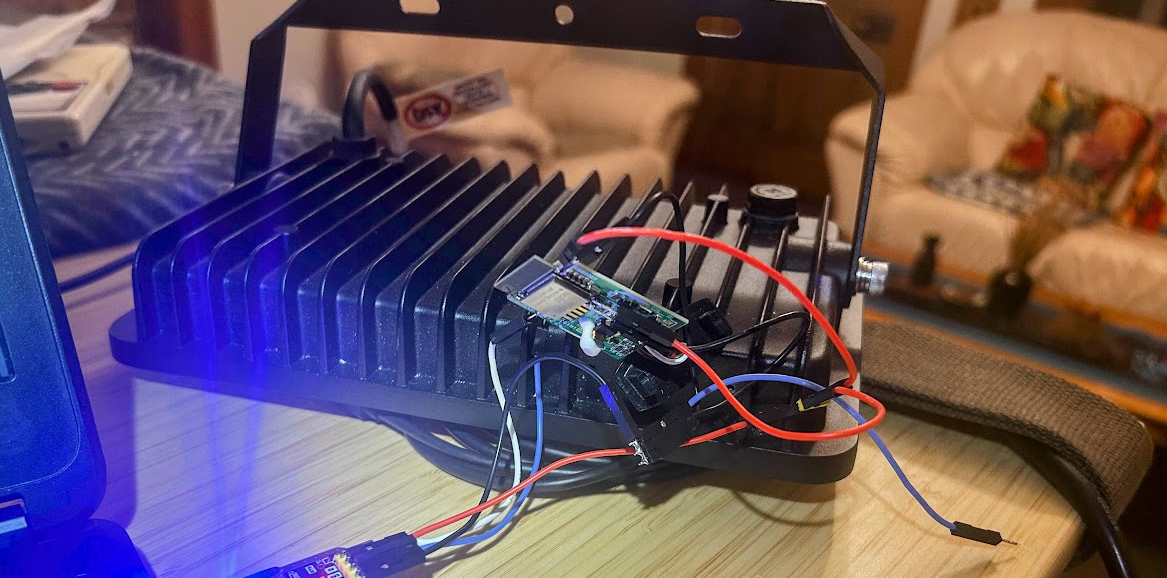
TL;DR:
- You can replace the Tuya CBU with an Espressif ESP8685-WROOM-06-H4 and ESPhome
- To put it in flash mode, pull GPIO8 high, and GPIO9 low.
- If you’re on Linux, make sure your user is in the dialout group to write to the device.
- Scroll to the end for the YAML
The article:
(I actually wrote the detail of this post in 2024 but didn’t convert it into an actual blog until now. Good times.)
The Orbit range of smart lighting is another rebranded Tuya line. As in previous iterations of this article, controlling the device with Home Assistant was slow, presumably due to the calls to the Tuya datacentre - and I really just wanted to have devices that are entirely under my control.
The Tuya component is underneath an obvious antenna box at the top of the floodlight:
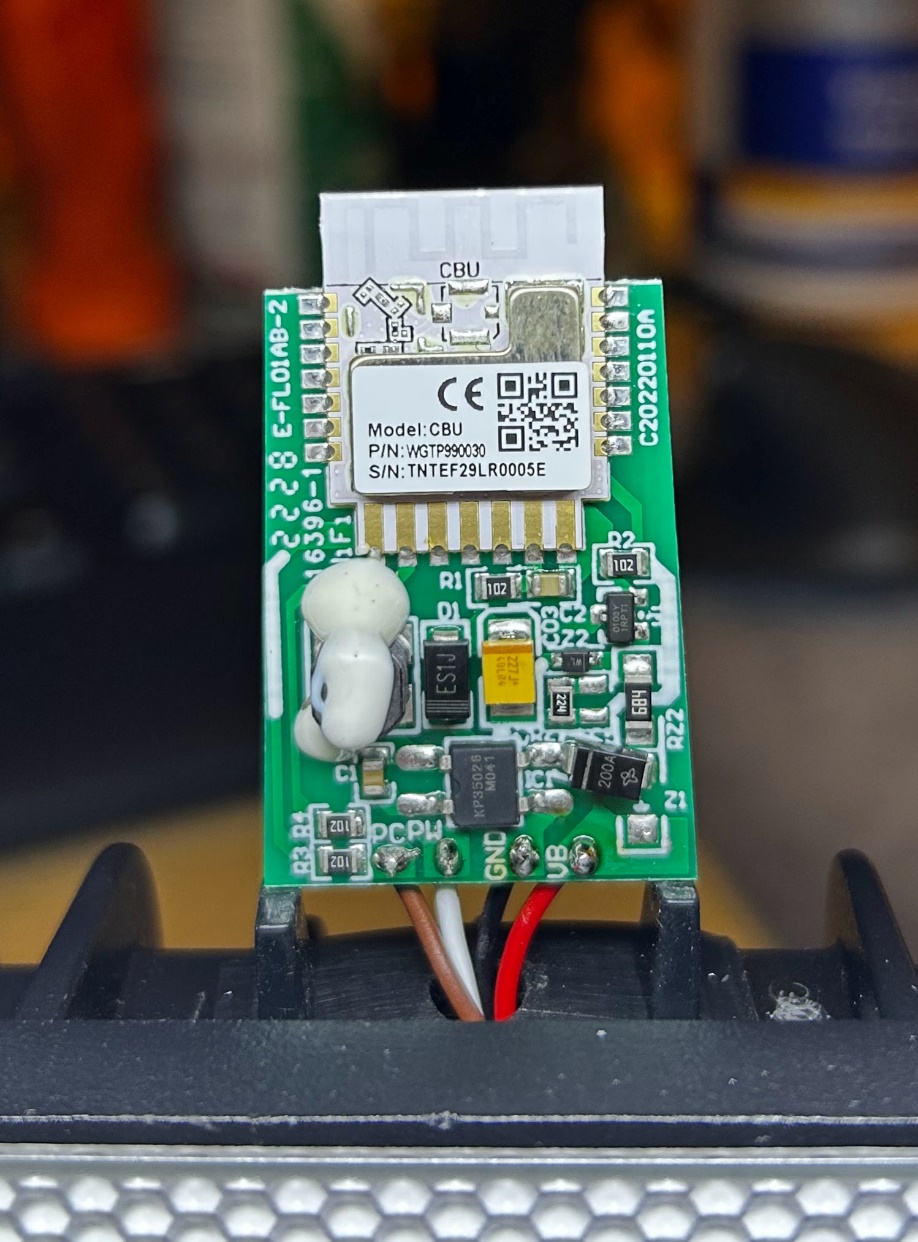
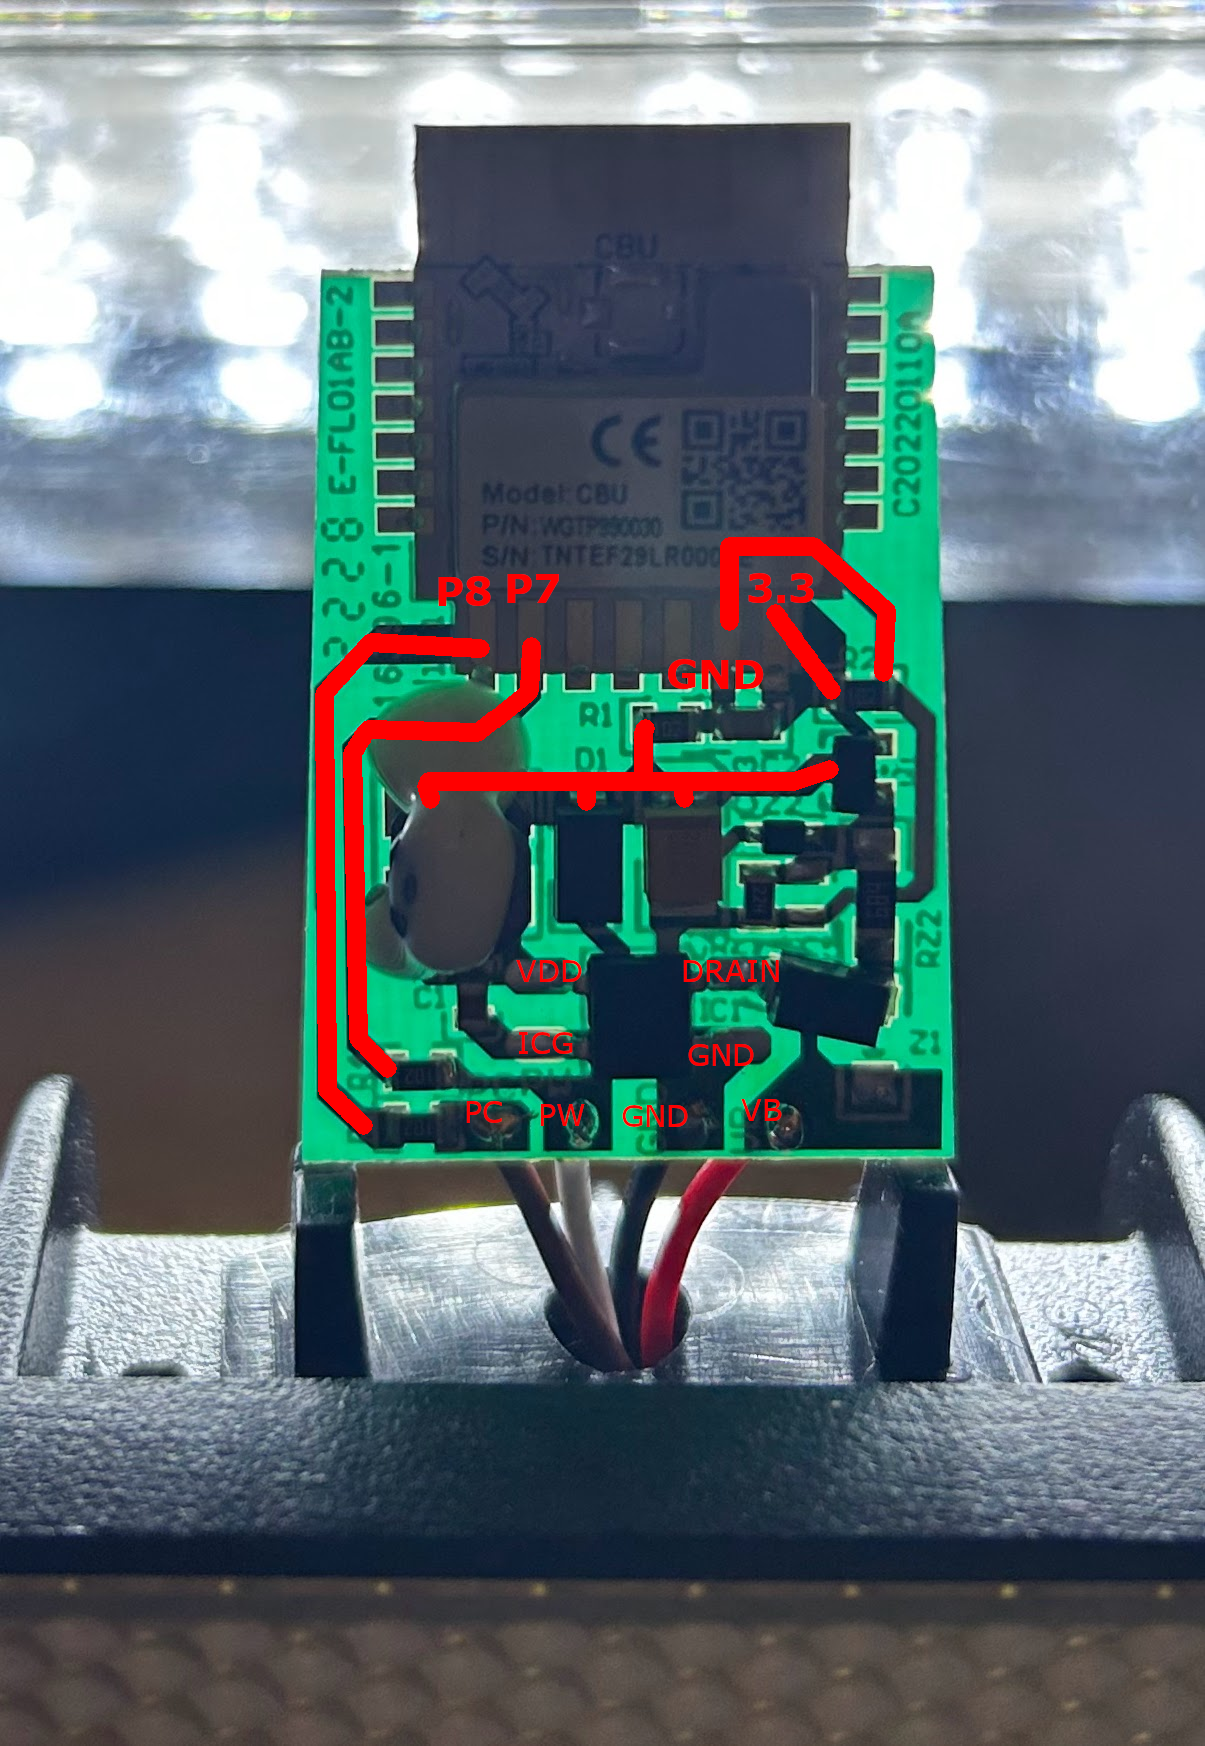
This is a very simple device – no buttons, no switches, just a simple light output. At the top is a Tuya CBU module, and below that is a Cokintech KP35026, the PWM-controlled power switch driving the LED’s.
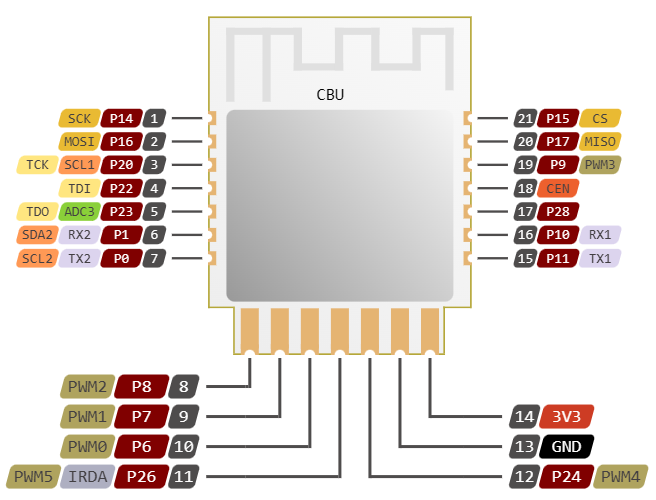
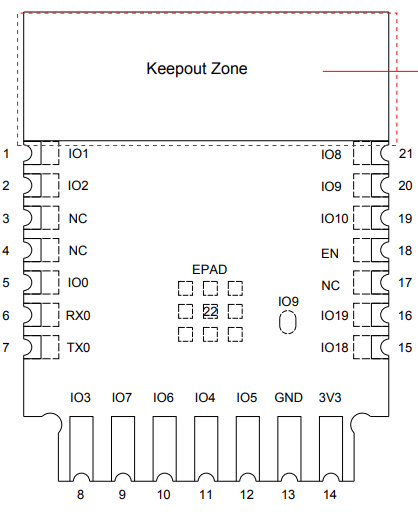
The traces here are very, very simple. You’ve got 3.3v and GND where you expect them to be, and then you have an output from P7 and P8 – here’s the pinout from https://docs.libretiny.eu/boards/cbu/:
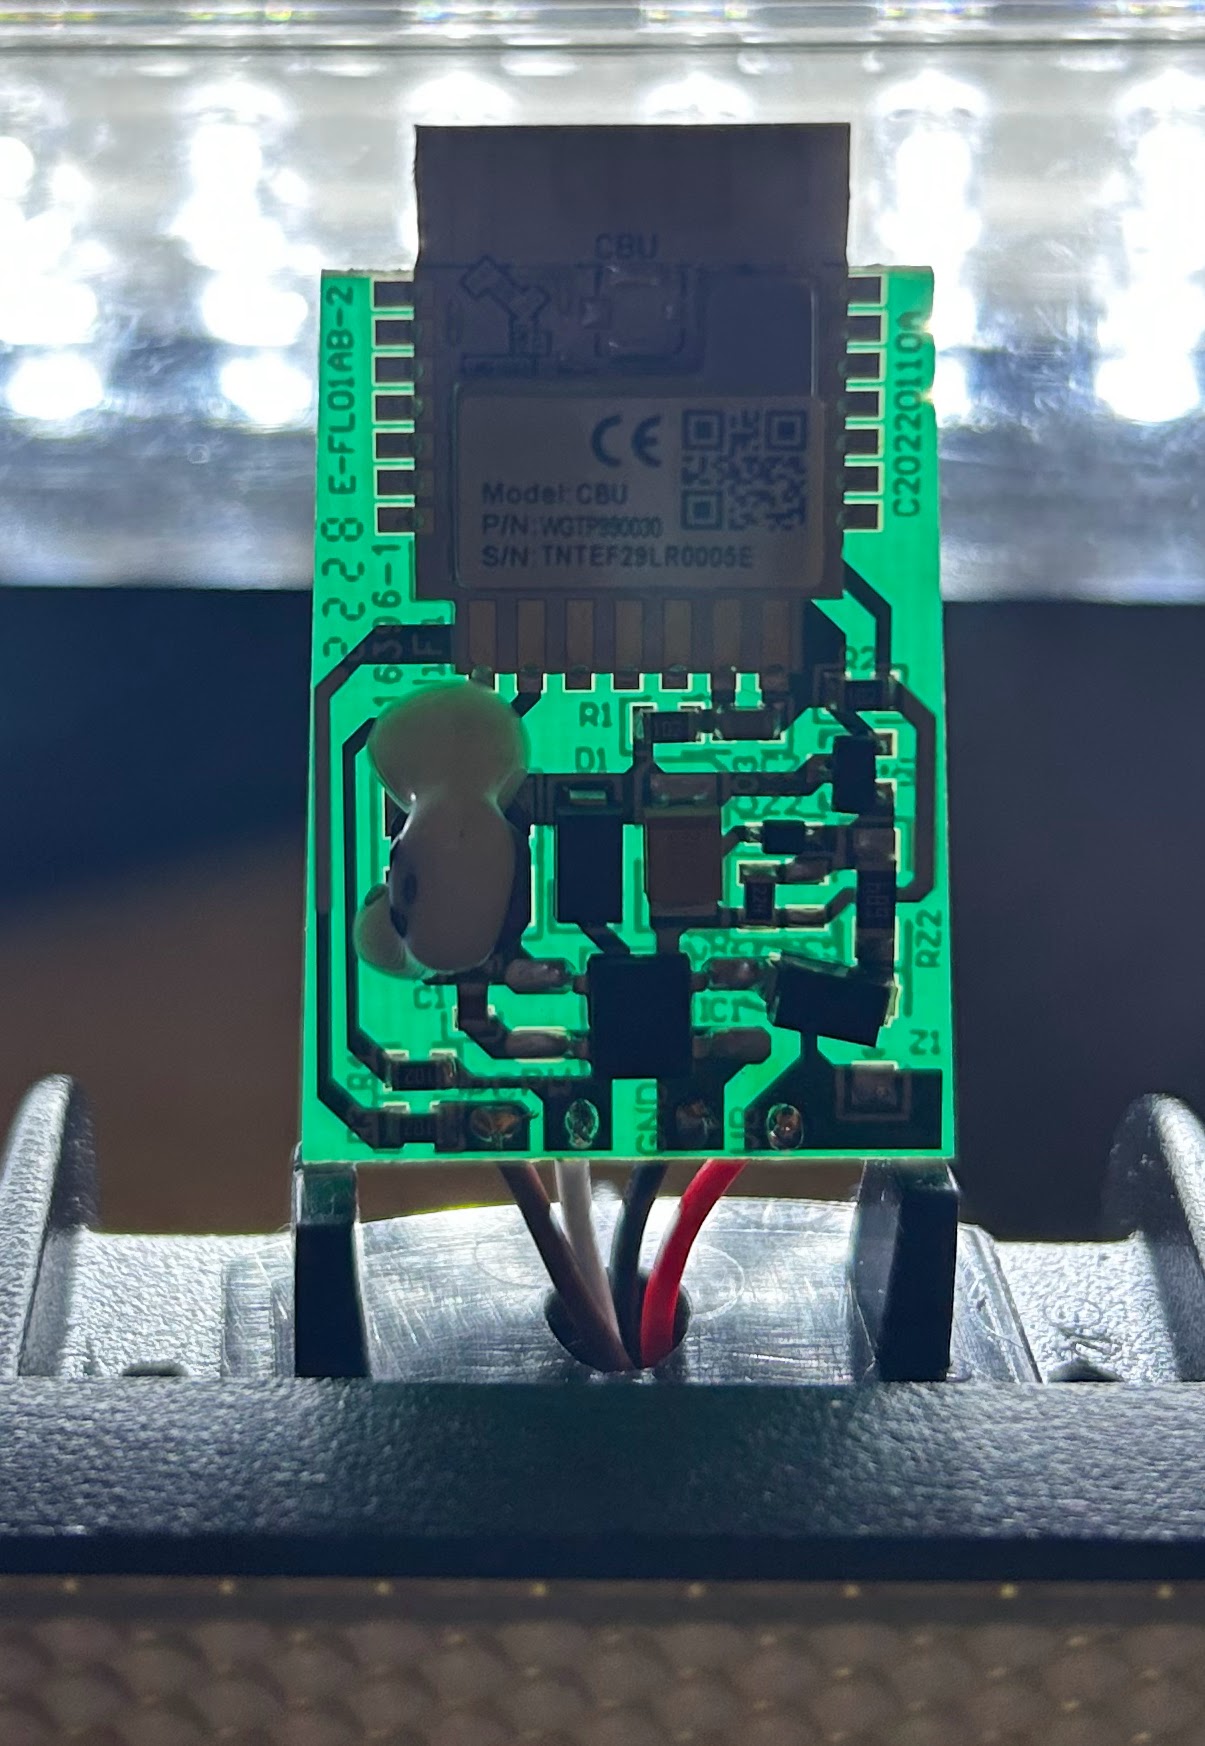
The backlit view really helps demonstrate how little is going on here:
Before I desoldered the CBU from the board, I connected RX and TX and dumped the Tuya firmware, and decoded this with the OpenBeken flash tool from https://github.com/openshwprojects/BK7231GUIFlashTool. Here are the interpreted results:
Device configuration, as extracted from Tuya:
- LED Cool (Channel 4) on P8
- LED Warm (Channel 5) on P7
- PWM Frequency 1000
Device seems to be using CBU module, which is using BK7231N.
And the Tuya section starts, as usual, at 2023424
Too easy. Swapping that to the ESP8685-WROOM-06-H4 pinout turns them into GPIO3 and GPIO7. Additionally, to put it into download mode we need to bring IO8 high and IO9 low. And if you’re running Linux, your user needs to be in the dialout group for permissions to write to /dev/ttyUSB0.
The YAML snippet:
The YAML is below. Note this is partial YAML; other important parts such as enabling the API and OTA are left out. This uses the ledc platform to manage the PWM output, and the cwww (Cold-White, Warm-White) light platform to present a usable control. I also chose ALWAYS_ON as the power-restore light, as that allows people to also use it as a regular light.
esp32:
  board: esp32-c3-devkitm-1
  framework:
    type: arduino

output:
  - platform: ledc
    pin: GPIO3 # P8 on CBU
    id: gpio_cold
  - platform: ledc
    pin: GPIO7 # P7 on CBU
    id: gpio_warm

light:
  - platform: cwww
    name: "LED Floodlight"
    cold_white: gpio_cold
    warm_white: gpio_warm
    cold_white_color_temperature: 6536 K
    warm_white_color_temperature: 2000 K
    constant_brightness: true
    restore_mode: ALWAYS_ON